Hello everyone,
Thank you for stopping by the Shabby Art Boutique. I’d like to say a great big welcome to my many new followers. . . gosh, where do you all come from? That followers counter just keeps on ticking over every day. I remember when I started my blog, I wondered if I’d ever get to 100 followers. . . so I find it hard to believe that I’m now nudging 1,000. I’d better come up with a pretty decent giveaway for that milestone!
Today I’m sharing a project I finished over the weekend.
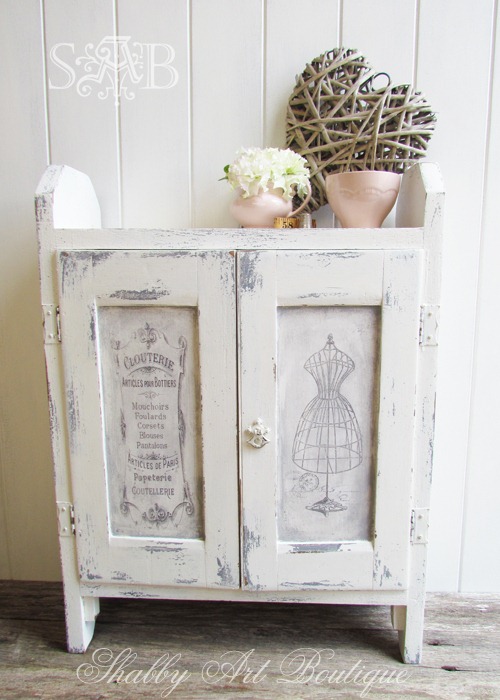
This largish vintage cabinet belongs to a client of mine, who commissioned me to ‘shabby’ it up to match a crafting caddy I made for her recently.
As you can see, she was a bit of a mess with glue stains, peeling paintwork and several drippy coats of white paint.
The best advice I can give anyone who is refinishing furniture is this. . . put the time in for the prep work. You can’t expect great results if you are repainting over chipping, peeling paint, debris or years of built up coats of drippy paint. Remember, we want a shabby looking finish. . . not a shabby job!
Needless to say, the biggest part of this ‘shabby’ project was sanding her back. I then repainted her with a couple of coats of Antique White paint. I made two transfers for her doors. . . this cabinet will be going in a sewing/craft room, so I thought these gorgeous graphics from The Graphics Fairy would be perfect. After that, I gave her a big dose of shabbilicious distressing and antiquing.
I was able to re-used the original hardware, which already had a few coats of chippy paint and finished the look perfectly.
I hope my client loves her new look craft room cabinet!
I’m sharing this project this week on The Graphics Fairy’s Brag Monday and all the other fun and creative link parties.
If you can spare the time, I’d love to know where you are from.
Hugs ~ Kerryanne